Get cash back on your astronomy and other purchases: Ebates Coupons and Cash Back

Sunday, April 20, 2014

Another minor AD10 mod

I really didn't like the way my AD10 banged into its base when I swung it vertical.  I don't think it would do any damage, but the clank, even when contact was gentle, bothered me.  So I added a small rubber bumper.

It's 1/2" wide and 1/4" thick, attached with a #4 x 5/8" wood screw just above the lower attachment of the handle on the base.

I'm sure these can be found lots of places.  Home Depot has self adhesive bumpers, but I figured a screw would be a more permanent one.  I found mine at Marshall's Hardware.

Photo of M35

While I've been waiting for the clouds to clear, I've been making progress on my new tripod and barn door tracker.  Hopefully this will be the final version.  All the parts are cut and I've been applying the varnish.  Should be ready to go later this week.  Once it's up and working, I'll post pictures and plans.

I've also been playing around with processing some photos I took with the old barn door tracker.  Here's one of M35 taken with my Canon T3i and Bushnell 135mm lens.  ISO 1600, f/2.8, 174 x 2 second exposures.

Star hopping with Cartes du Ciel

The other night the clouds finally cleared up, so I was able to get the AD10 out and make my first attempt at star hopping.  Earlier in the day I figured Auriga would be the best area of the sky to pursue since it would still be above the neighbor's tree and away from the lights.

Using Cartes du Ciel, I had plotted out some maps with finder and eyepiece circles.  If you haven't checked out this program, it's quite nice (and free!)  You can set up your own finder circles by going to the Setup->Display menu option and clicking the Finder Circles tab.  You'll need to figure out the field of view (FOV) of your finder and eyepieces.  Through some observation, I found that Orion's belt spanned from the center of the crosshairs in my 9x50 finder right to the edge of the field.  That tells me my finder has about a 5.5 degree field, so I entered 330 in Cartes du Ciel.  The input is in minutes (5.5 * 60 = 330).

Through calculation, I figured out my 30mm eyepiece has a 96 minute FOV.  How did I arrive at this?
My scope has a 1250mm focal length and the eyepiece is 30mm, so magnification is 1250/30 = 41.7x.
The specs of the eyepiece say it has a 68 degree apparent FOV (AFOV).  True field of view (TFOV) is AFOV / magnification, so 68/41.7 = 1.6 degree TFOV.
Convert to minutes, 1.6 * 60 = 96 minute AFOV.

Using the same calculations, I arrived at 48.57 minutes for my 30mm with 2x Barlow, 22.45 minutes for my 9mm, and 11.22 minutes for my 9mm with 2x Barlow.

In Cartes du Ciel, I only enabled circles for the finder and 30mm with and without Barlow.  If all of them are enabled, the chart gets too crowded.

I set the program's time to 8pm and located Auriga.  I know that I can see Capella easily with my naked eye and can barely make out Al Anz and Hoedus Li (I got these names from Cartes du Ciel).  All three stars barely fit in the finder circle, so I started by positioning the screen so all three were in the circle and zoomed in so the circle field the screen.  I printed this first chart and labeled it #1.
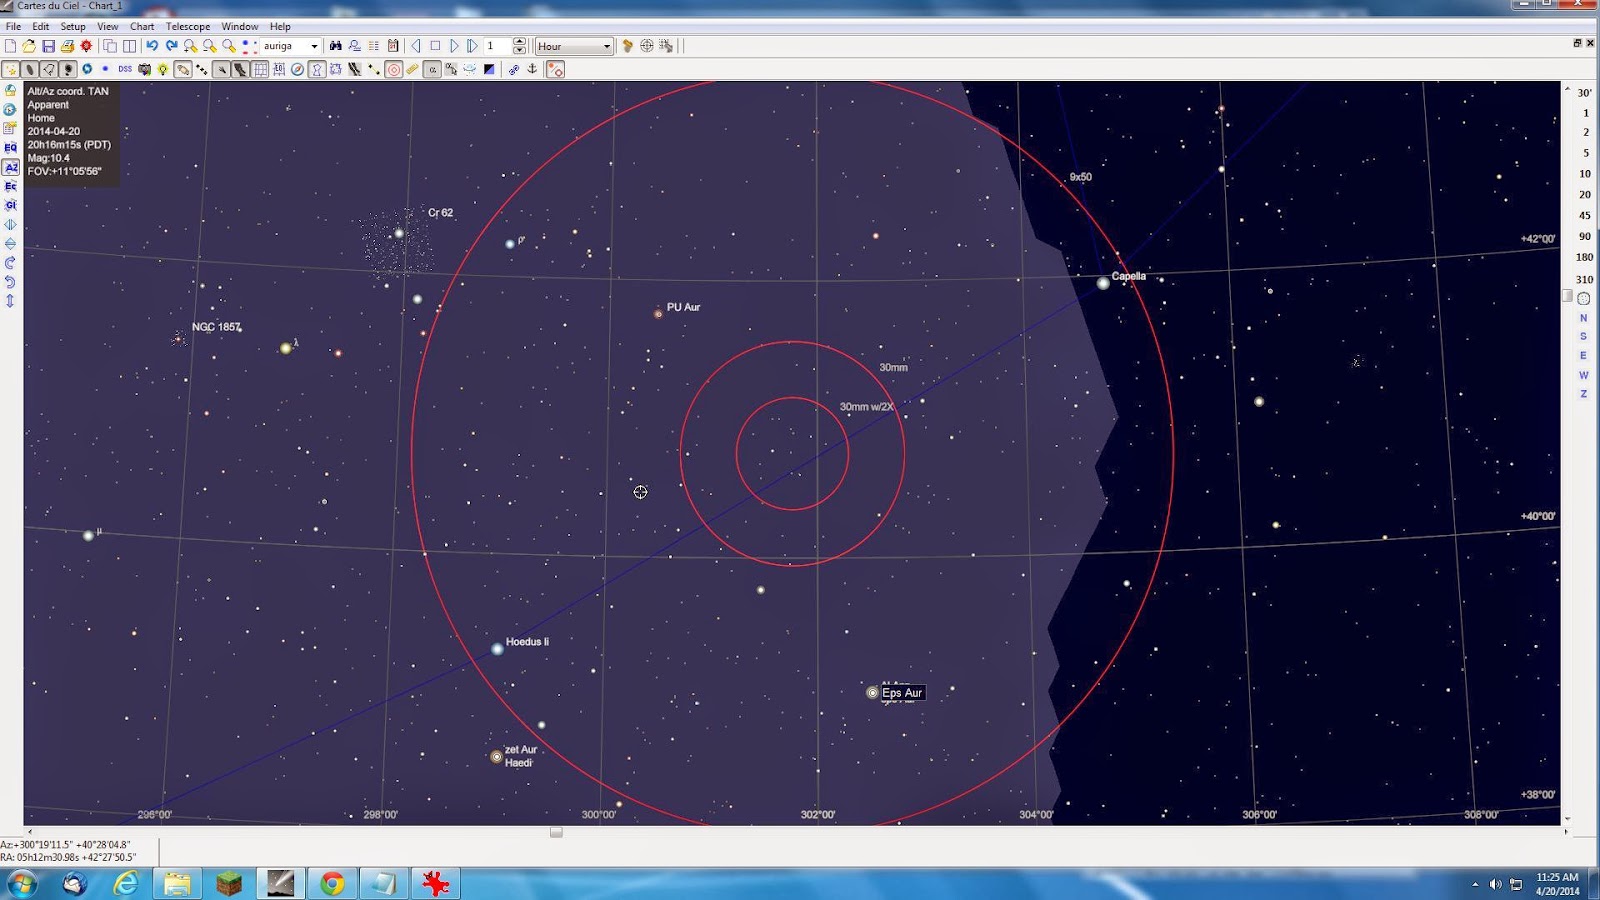

Next, I shifted the view so Hoedus Li was at the bottom edge of my finder view and printed chart #2.  That puts several promiment stars near the center of the field of view.  Lambda Auriga (the Greek character lambda looks like an upside down y) is the southernmost one of the group.  I slid the view south, so lambda was at the rightmost edge of the view and printed chart #3.  This put M38 in the field of view, which is my first target of the night.  I centered on M38 and printed chart #4.  With M38 centered, M36 was also in the field, so I centered on M36 and printed chart #5.  On each of my charts, I also circled the items of interest so I wouldn't forget and drew lines showing which way I wanted to move when hopping.
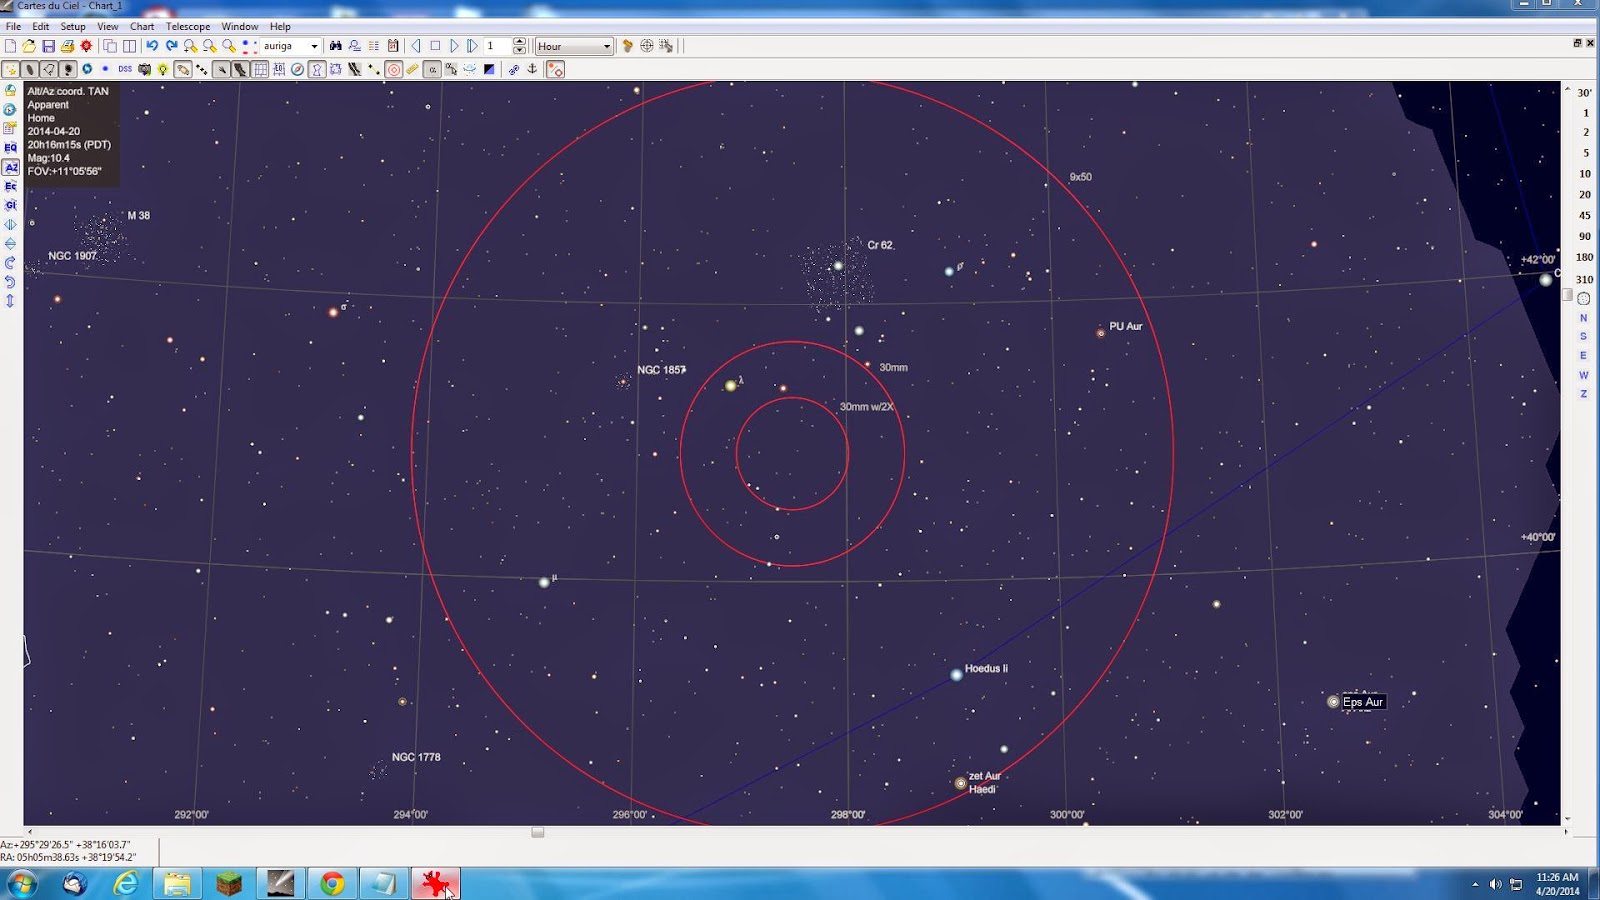
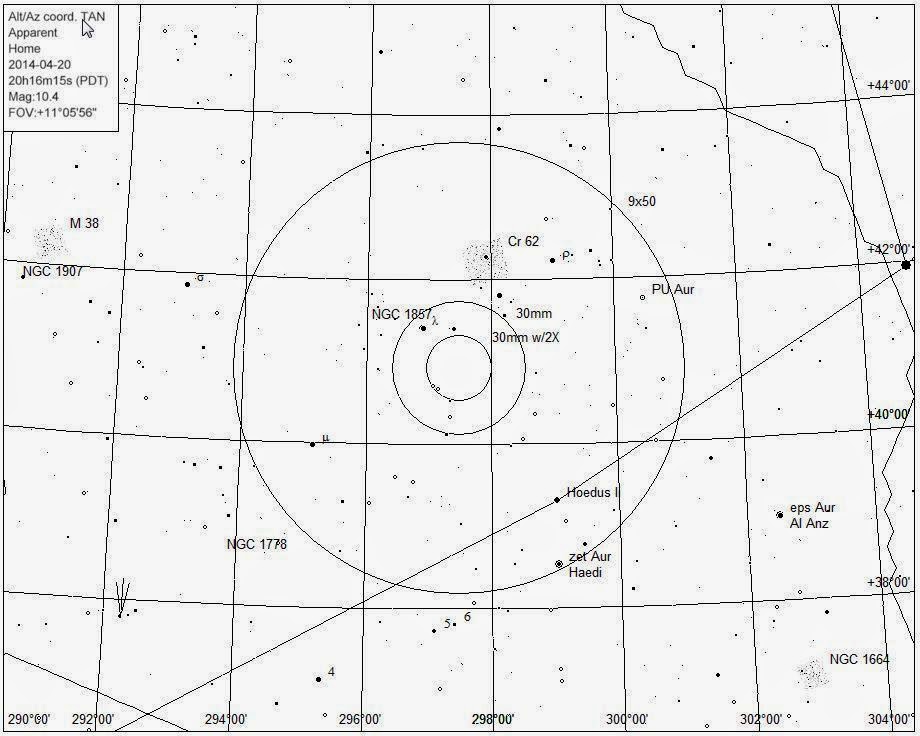
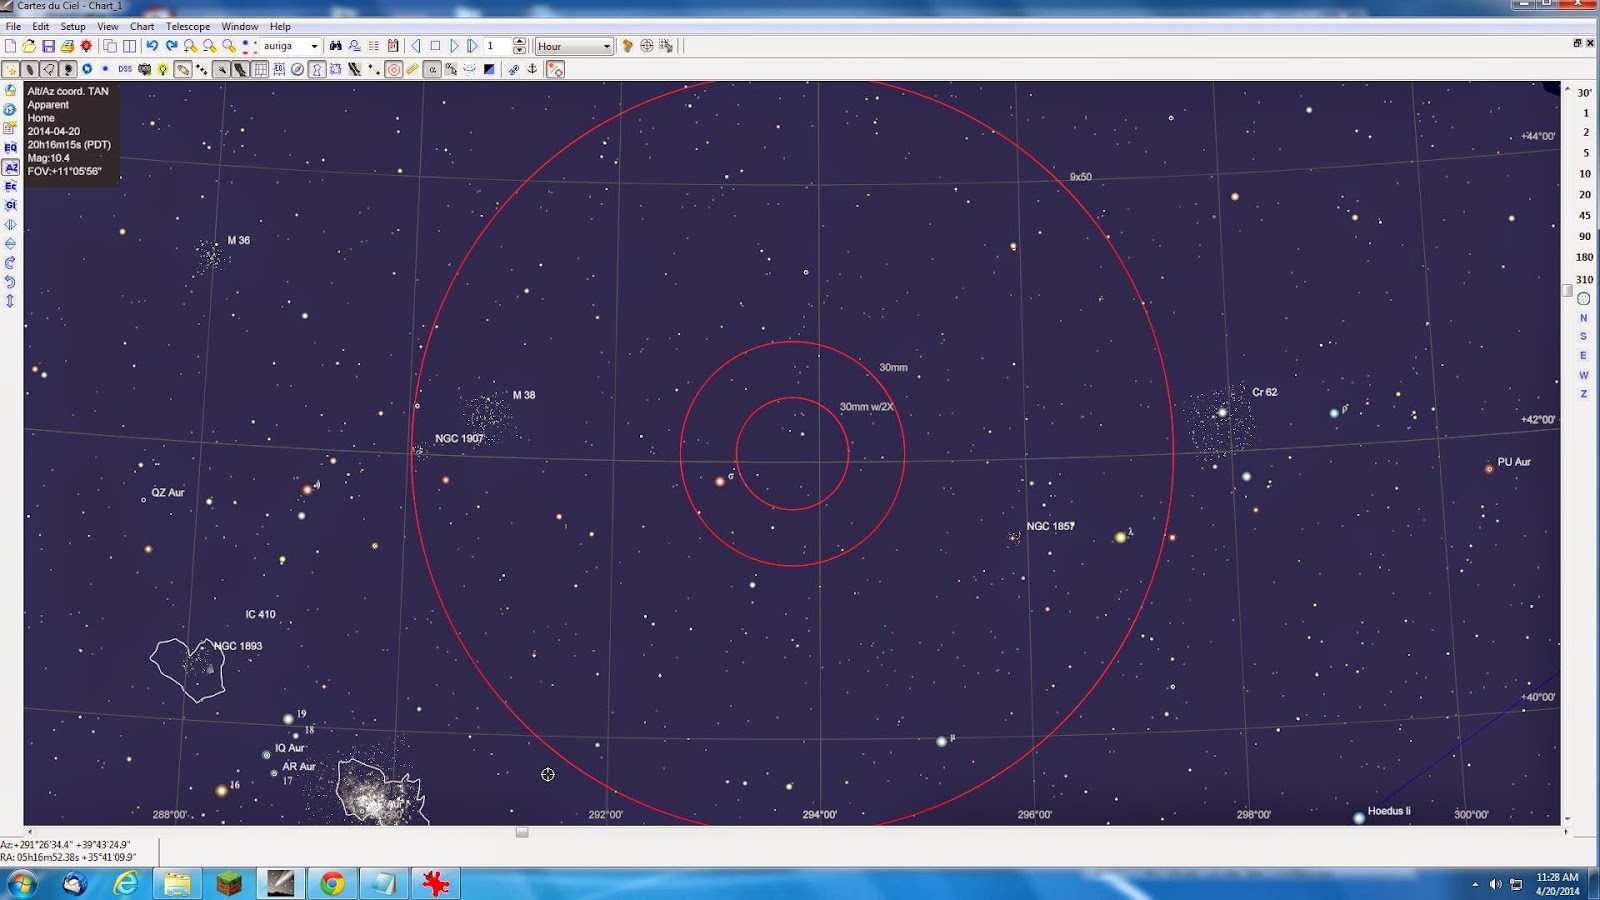

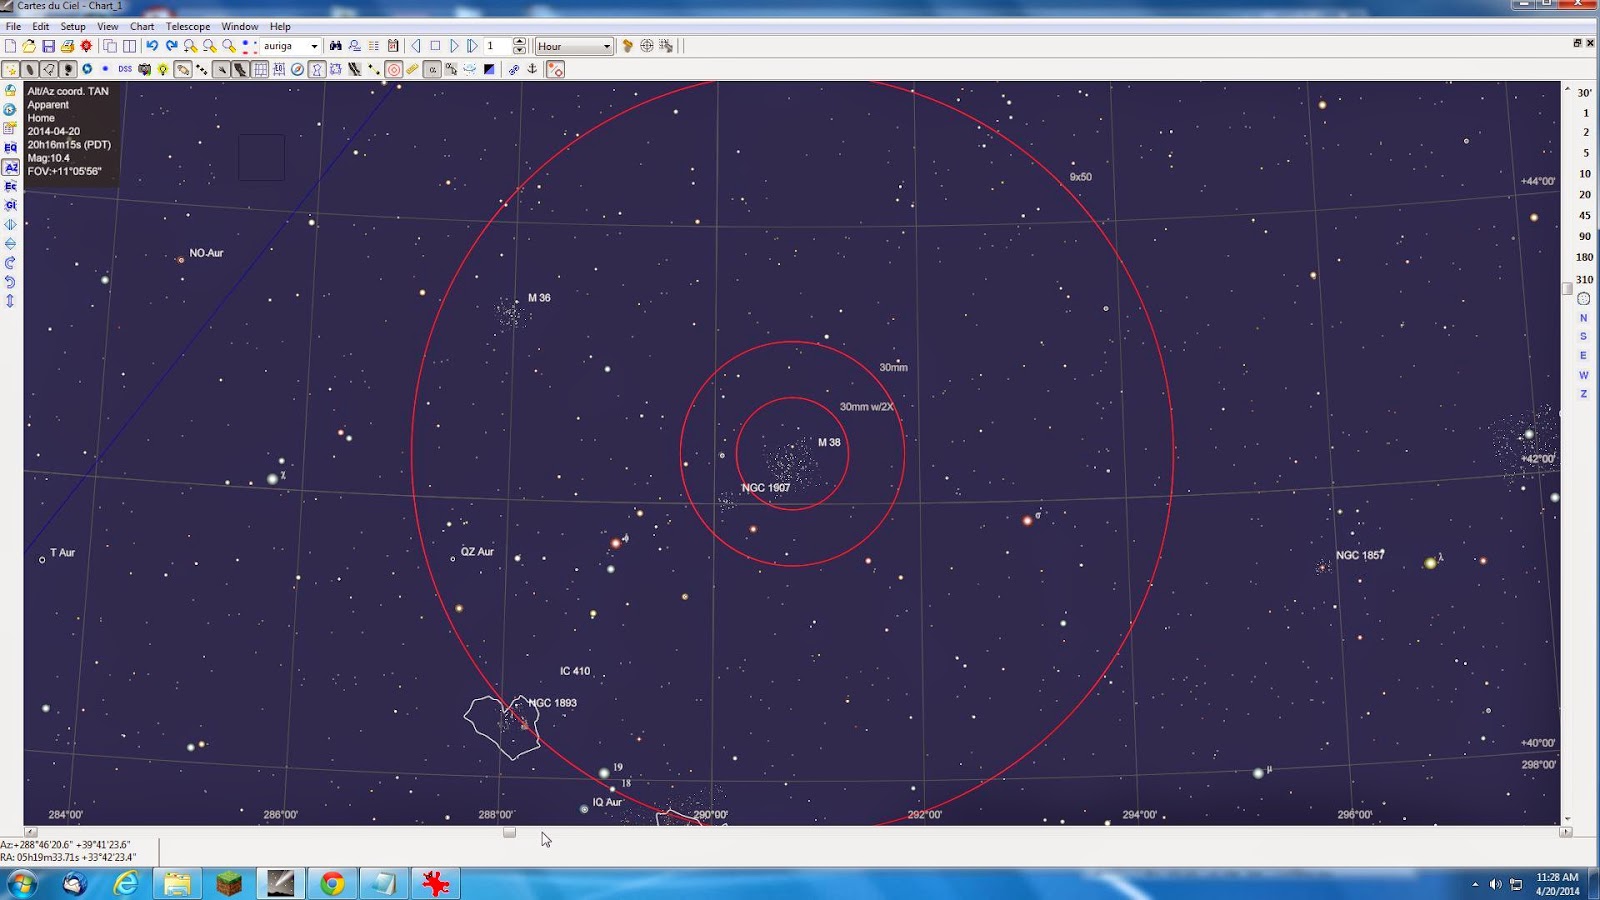


After dark, I set up and waited a few minutes for my eyes to adjust.  Hoedus Li was just above the branches of the neighbor's tree, so I positioned it in the bottom of the finder and started hopping according to my charts.  It took a couple of tries, but pretty soon I had the finder centered around where I thought M38 should be, although I couldn't see it in the finder (too much light pollution).  Looking in the scope with my 30mm eyepiece, I saw several stars bunched together at the edge of the field, so I shifted it over and was rewarded with a very nice open cluster.  I popped the 30mm into the 2x Barlow and M38 filled the field.  After admiring M38 for a while, I shifted my view to where I expected M36 to be and found it as well.

A very successful star hopping experience!

Monday, March 31, 2014

Finally some observing!

The weather finally cleared up after several days of clouds and a full moon before that.  I lugged the AD10 out into the back yard to get some observing time in.  I don't have a lot of sky to look at from my small yard.  My house is right to the south, the neighbor is about 30 feet away to the north.  There's a tree to the west, and the neighbors on the east have bright lights shining all night.  Regardless, I pressed on.

Jupiter was pretty close to the zenith, so that's where I started.  It was extremely clear and steady, great seeing.  I was able to use my 9mm in a 2x Barlow, so about 278x.  With this I could easily see lots of detail on the surface.  Io was next to it and I could see the shadow of two of the moons, Io and Ganymede if I'm not mistaken.  This was also a good opportunity to practice tracking an object using the dobsonian mount.  It still feels a bit awkward, but I'll get used to it.

I tried to look for M97 and M108 in Ursa Major, but didn't have any luck.  Partly because of the lighting and partly because I don't know what I'm doing yet.  So I swung around to Auriga which was in a much better position.  I tried to locate a few things in the area, but still didn't have any luck.  I was using an old copy of Tirion's Bright Star Atlas 2000.0, but I found it hard to relate the small size of the maps to what I was seeing the scope.  Since I couldn't find anything in particular, I spent a while panning around with sky with my scope.  I spotted some double stars and saw lots of pretty, colorful star fields.

Now I'm reading up on how to star hop, so hopefully I'll be able to find some things next time.  I've got Cartes Du Ciel, which is a free program that can generate and print star maps, as well as Stellarium (another free planitarium software), and a couple of others.  I'm hoping that those, along with the Tonight's Sky observation planning web page, will give me the tools I need to star hop successfully.  I'm also planning to build a leveling base with setting circles for my AD10.  Along with the SkEye app on my phone, I should be able to find things.

Simple Apertura AD10 mods

While waiting for the full moon to go away and clouds to clear, I did a couple of quick mods on my Apertura AD10.  First, to display my mad sewing skills (yeah right), I made a cover for the bottom end of the scope.  As I currently store the scope in the garage, and the mirror cell is open at the edges, this will keep any dust and spiders out.

I first took a strip of 3/8" elastic and cut a length that would stretch slightly to fit around the tube.  Not tight, just enough to hold it on.  I sewed the ends of the strip together to make a loop.  Next, I cut a 16" disk from the back of an old t-shirt.  I attached the elastic strip to it at one edge with a few stitches, then at the opposite edge.  Then I attached it at the edge halfway between the first two.  I kept repeating this, adding a few stitches halfway between the previous, until I had the elastic attached every 1/2" or so.  By doing this, the elastic and fabric have room to move and stretch.

The other mod was to replace the collimation springs.  This is one of the mods that would have been included if I had purchased the "Tweaker's Dream Package" with my AD10, but it can be done very simply and much cheaper.  I haven't had my scope out enough to know the difference, but I've read many suggestions on the net to do this mod.  I purchased my springs from McMaster-Carr, part number 1986K117.  This is a 0.5" long by 0.5" wide stainless steel spring.  You can see the stock spring on the right and the new spring on the left in this picture.
The new springs are significantly stiffer than the old ones.  Replacing the springs is a trivial process.  First loosen all three locking knobs.  Then remove one of the collimation knobs, pull out the spring, slip in the new one, and reinstall the colliimation knob.  Repeat for the other two collimation knobs.  Be sure to only do one spring at a time.  When you're done, tighten all three collimation knobs then perform a normal collimation on the scope.  

One last thing I did was adjust the balance of my scope.  I originally installed the altitude bearings when the manual stated.  I've found that even with the 30mm 2" eyepiece, it's still tail-heavy and wants to swing straight up.  To stop this, I had to really tighten the grips on the altitude bearings, which made it more difficult to move smoothly.  I have now adjusted the bearing positions by loosening the mounting screws and sliding the bearings about 1/2" towards the bottom end of the scope.  This seems to be a good compromise in the balance of the scope.  

Straight rod barn door tracker

I'm moving forward with building my straight rod barn door tracker since I couldn't get good results with the curved rod one.  I found a couple of very good sites with lots of information.  ZZJ's barn door tracker provides a lot of information and good design theory.  He also provides a nice program in C++ to calculate delays for the loop.  The only problem is it's for an ATTiny85 MCU instead of an Arduino.  Rather than try to translate the code from one to the other and figure out the differences in timing, I went with a design based on another tracker by a user who goes by 0x05 on Reddit.  I based my design on the code he provided and added some additional functionality.  It took a bit of thinking to work out the math for my delay timings, but I think I've got it figured out.  

This one's got a 12" threaded rod which should provide me with about 2 1/4 hours of tracking before I need to reset.  For the motor mount and pivots, I found some materials at ePlastics, which is actually a local shop for me.  I used a 5/8" Delrin rod, for a 12" piece it was under $2.  For the blocks, I tried to find some nylon as others have used, but the shop didn't have any scraps and a small sheet was ridiculously expensive.  Instead, I found a 3"x6"x1" scrap of polyethylene for $2.  Perfect material for this.  It machines really well on a table saw and drill press.  Just don't try to sand it much, it gets very fuzzy.

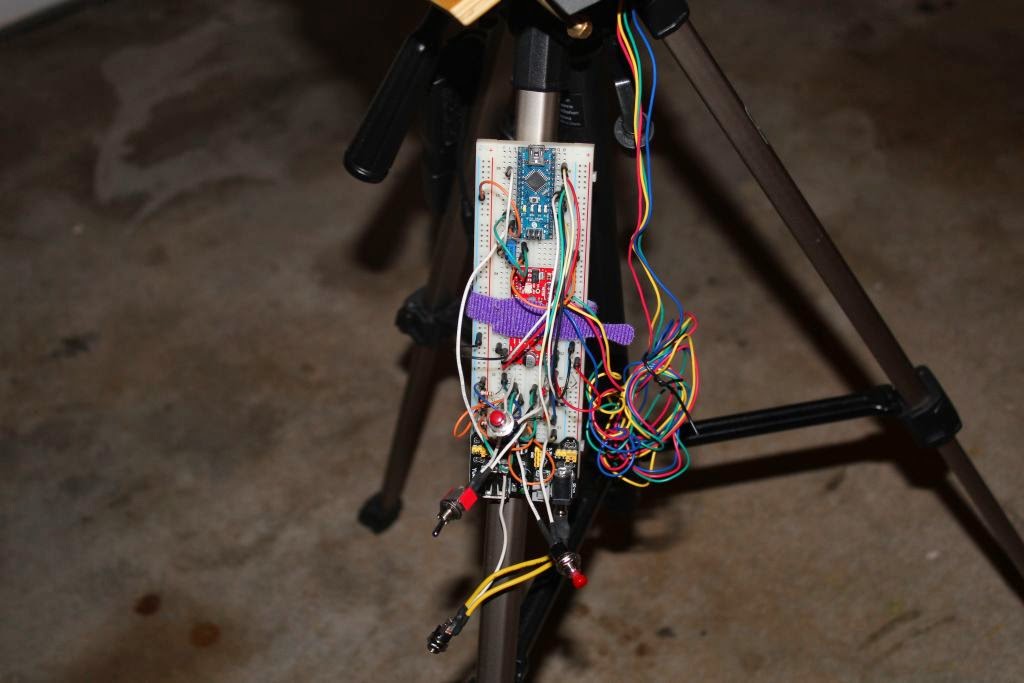
 Yes, my prototype board still looks like a rat's nest.  In there I've got a SainSmart Nano V3 Arduino compatible and a breakout board for an A4988 stepper motor driver (similar to the one from Polulo, but for only a couple of bucks off eBay).  This driver allows 1/16 microstepping, which really smooths out the motor.  I've also hooked up a start/stop/rewind button, "fast" mode switch to run it at a much faster rate (possibly for drift aligning, if that works out), and a limit switch so when it's powered on, the tracker can rewind to a known position.

This all seems to work great at the moment, but I have come across one problem.  My tripod is too wobbly.  It's great for mounting just the camera, but the mount is pretty heavy, so any little touch makes it wiggle all over.  So, next I'll be building a nice, sturdy tripod for my mount.  I think I've come up with a nice design that I threw together in SketchUp.
It will be plenty sturdy and will provide fine adjustments for altitude and azimuth for setting polar alignment.

More pictures and info to come once I've build the tripod and get everything working.

Saturday, March 15, 2014

Barn Door Tracker #3

Third attempt with the barn door tracker, this time using a 200 step/rev stepper motor and an EasyDriver stepper driver, which allows 1/8 microstepping.


I found that to get microstepping to work, I had to turn the current limiting pot all the way down.  Without doing that, the motor would always do full steps.  The pot on my EasyDriver is installed backwards, so I had to turn the pot all they way to the direction labeled max.  You can tell this by measuring the voltage at the test point TP1.  When you get minimum voltage, the pot is set to the minimum current.  I ran the Arduino on 7.4V and the EasyDriver and motor on 5V.

This still didn't give good tracking results though.  With my 135mm lens, I could expose for about 10 seconds max.  Any more than that and I would get short trails.  The trails were always consistent in length though.  Whether I exposed for 20 seconds or 5 minutes, they were always the same length, and they were also the same length as the ones I got with the cheap eBay stepper motor.  This tells me the motor and code aren't the issue.  I suspect the problem is my gears.  Maybe some imperfections in the gears or somewhere else in the drive train is causing the problem.

So for my next attempt, I'm going to build a different design of tracker.  This time with a straight shaft instead of a curved one.  Rather than a consistent stepping rate for the curved shaft, I will need to vary the speed of the motor with the straight shaft to account for the tangent error of the design.  I've found several sites online that cover the design, but I think the most complete and informative one is ZZJ's Barn Door Tracker.  He covers a lot of the details of the design, measurements, and calculations.  I will use most of the same components for the drive circuit and the 200 step/rev motor.

I spent the afternoon today cutting the wood and plastic parts for it, we'll see how it come out.